LED Poi experiments
LED Poi experiments
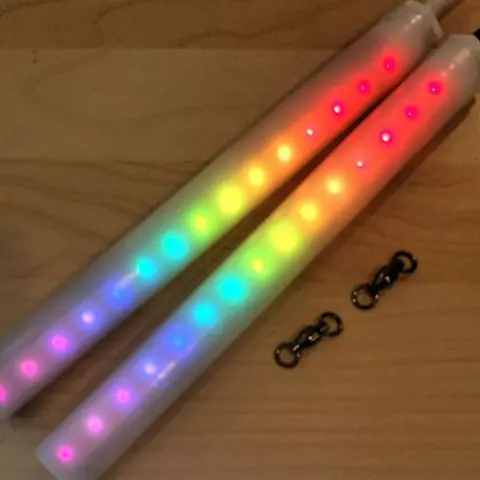
Image
LED Poi
Various documents about build and use of LED poi and similar light/POV things
Advanced configuration
Advanced configuration
Pro-tip -- you can edit the sketch to make it cycle automatically by default. Find "boolean autoCycle = false;" and change that false to true and the images will cycle every 15 seconds. You can change that cycle time, too. Next section will have information about programming
Creating images
Creating images
The python script works with gif files and png files. It does not support JPG or BMP images. The pics work the best if you use a black background, not a white background!!! Also, your pics need to be only 15 pixels tall. Use the python script.
- Install Python version 2.7 for Windows because Python Imaging Library isn't available for Python 3.x yet. Download from here: https://www.python.org/downloads/release/python-2714/ -- I used the "windows x86 msi installer" and installed it in the default location, c:\python27 and I checked the box to add python to the environment variables. Python installation requires a reboot.
- Install Python Imaging Library 1.1.7 for Windows. Download from here: http://www.pythonware.com/products/pil/ -- download PIL 1.1.7 for Python 2.7
- The python script is in the "convert" folder that you grabbed. Here's the easiest way to use it:
- Exit the Arduino IDE.
- Navigate to the "convert" folder.
- Put your images in the same folder as the convert.py script file. Make sure there's no spaces in the file names of the pictures.
- Open a command prompt and navigate to the folder with your convert.py script and your images.
- If you have a picture called fire.gif then type the command "python convert.py fire.gif > graphics.h" without the quotes.
- If you want to have multiple pictures, list them all in that command separated by a space. Like this, "python convert.py fire.gif fire2.gif fire3.gif > graphics.h" without the quotes.
- The command should finish quickly and with no messages. It will generate that graphics.h file in the same folder.
- Put the graphics.h file in the same folder as your poi.ino file. Pro tip -- come up with different names for the graphics.h files so that you can keep a whole bunch of versions.
- Reopen the poi.ino file in the Arduino IDE and make sure the "graphics.h" name in the sketch matches the graphics file you want to use.
- Pro-tip -- make a batch file!
- Navigate a command prompt to the folder with your pictures.
- Do this: "dir /b > pics.doc" (you'll thank me)
- Open that pics.doc and do a find/replace, replacing ^p with a space.
- Now you have a list of your pictures separated by spaces! Delete any file names, like the convert.py and any graphics.h file that you want to remove from that set. You'll get an error message for any files that aren't gif or png.
How to use the poi
How to use the poi
- Charging/program port uses a normal micro USB cable and USB charger.
- The green LED tells you when it's fully charged.
- Sliding switch turns it on and off. When you first turn it on, some random LEDs will light up, then there's a red LED inside that will blink a couple of times, then the LEDs will do a rainbow, then it will start the first image. The length of that rainbow also tells you how charged the battery is.
- The button changes the image. If you hold the button down 5 seconds, the images will change every 15 seconds.
Programming the poi
Programming the poi
- I used the 1.8.5 Arduino IDE to load the sketch. To install the Arduino IDE and Windows drivers, follow
these instructions: https://learn.adafruit.com/adafruit-arduino-ide-setup/arduino-1-dot-6-x… -- the tutorial calls out for version 1.6, but the "latest IDE download" button gets you 1.8.7. There is currently a bug in Arduino 1.8.7 which requires you to select a Port before upload but we don't use Ports for Pro Trinket uploads. If you don't have a Serial Port available to select, please use Arduino 1.8.6 - Also follow these instructions to get the Windows driver: https://learn.adafruit.com/adafruit-arduinoide-setup/windows-driver-installation Be sure to install the boards and libraries. You need the Adafruit Dotstar library.
- The sketch is actually based on the double-staff project, not the poi project, because I'm using the 5v Pro Trinket instead of the normal Trinket, so there's way more memory capacity. I'm including the script that works on these; I don't know your level of Arduino skill, but I've only learned by trial and error. There's lots of stuff in the double-staff sketch that's extra because that project uses a remote control.
- You can comment it out if you want, but that's more trial and error.
- You can find the instructions and code for the double-staff project here: https://learn.adafruit.com/pov-dotstardouble-staff
- Be sure to select the "Pro Trinket 5V/16MHz (USB)" board, and use the USBtinyISP programmer.
Uploading scripts
Uploading scripts
- Turn off the poi.
- Open dblstaff.ino file.
- You can edit the sketch to make it cycle automatically by default. Find "boolean autoCycle = false;" and change that false to true and the images will cycle every 15 seconds. The following line says, "#define CYCLE_TIME 15" -- that's where you can change the cycle time.
- You'll find the line that says, #include "graphics.h" When you've created more images files, that's how you select what set of images will load into the poi.
- Click the check button to verify/compile. If you get any error messages, check to make sure you installed everything correctly.
- Plug the microusb cable into the poi. You should hear Windows detect the usb device; one second after that chime, click on the app to upload the code and watch the progress. When the app says the upload is complete, you can unplug the poi and you're good to go. If you get a communication error, you probably tried to upload the code too soon or too late.